Written by: Ali-Reza Adl-Tabatabai, Founder and CEO, Gitar
Key Takeaways
- AI coding tools boost productivity 3-5x but increase PR review times by 91%, which can cost teams up to $1M annually.
- CodeRabbit offers quick GitHub setup with automatic PR reviews but only provides suggestions, so developers must apply fixes manually.
- Setup requires GitHub admin permissions, Marketplace access, repository write access, and an optional .coderabbit.yaml file for custom configurations.
- Common pitfalls include permission errors, Mac CLI path issues, and git repository requirements, which you can usually fix with admin access.
- Switch to Gitar for autonomous auto-fixing that resolves CI failures and implements feedback automatically, going beyond CodeRabbit’s suggestion-only model.
Access and Permissions Needed for CodeRabbit on GitHub
Confirm your access before you install CodeRabbit. You will need:
- A GitHub account with owner or admin permissions for the target repository or organization
- Browser access to GitHub Marketplace
- Repository write access for code, metadata, and pull requests
- Optional: Basic YAML knowledge to customize behavior with a .coderabbit.yaml file
Install CodeRabbit on GitHub in 7 Simple Steps
Step 1: Open the CodeRabbit GitHub Marketplace page
Visit the CodeRabbit GitHub Marketplace page and click the “Install” button. The installation process stays straightforward and low risk.
Step 2: Choose repositories for the GitHub App
Select whether you want to install CodeRabbit on all repositories or only specific ones. For organizations, you must have admin permissions to finish this step.
Step 3: Approve the required permissions
CodeRabbit needs read access to repository contents and write access to pull requests so it can post review comments. Accept the permissions dialog to continue.
Step 4: Adjust repository settings for CodeRabbit
After installation, CodeRabbit creates a CodeRabbitAI bot that automatically reviews PRs. Open your GitHub repository settings and use the CodeRabbit dashboard to customize how the bot behaves.
Step 5: Open a test pull request
Create a new PR to trigger CodeRabbit’s first review. The bot analyzes your changes, then posts inline comments and a summary.
Step 6: Add optional YAML configuration
Create a .coderabbit.yaml file in your repository root if you want advanced customization such as path instructions, GitHub checks, and tool integrations.
Step 7: Verify installation for Mac and CLI users
For CLI integration, install via curl -fsSL https://cli.coderabbit.ai/install.sh | sh and authenticate with GitHub OAuth. This confirms that CodeRabbit works from your terminal.
Fixing Common CodeRabbit Setup and Usage Issues
Permission denied errors
Check that your GitHub account has admin access to the repository or organization. CodeRabbit needs write permissions for pull requests to post comments.
Mac-specific CLI issues
CLI installation places the binary in ~/.local/bin/coderabbit and updates PATH automatically. If your shell does not recognize commands, manually add ~/.local/bin to your PATH.
First-time git setup errors
“Not a git repository” errors appear when CodeRabbit runs outside a git-tracked directory. Run git status to confirm the repository or run git init if you need to create one.
Stale marketplace cache problems
The CodeRabbit plugin may not appear in Claude Code until the marketplace cache refreshes, because the local cache can become stale.
Practical CodeRabbit YAML Configuration Examples
Use these .coderabbit.yaml examples to tailor CodeRabbit behavior to your codebase:
# Basic configuration github-checks: enabled: true timeout_ms: 30000 # Path-specific instructions path_instructions: – path: “src/api/**” instructions: “Focus on REST API best practices and error handling” – path: “tests/**” instructions: “Ensure comprehensive test coverage” # Tool integrations tools: eslint: enabled: true golangci-lint: enabled: true config_file: “.golangci.yml”
For multi-repository analysis, configure linked repositories under knowledge_base in your YAML file.
Why Teams Replace CodeRabbit With Gitar
CodeRabbit delivers solid PR analysis but stops at suggestions, so engineers still spend time applying changes. CodeRabbit achieves 46% accuracy in detecting bugs, yet every fix still depends on manual work. Gitar removes that manual step and closes the loop.
|
Capability |
CodeRabbit |
Gitar |
|
PR summaries |
Yes |
Yes |
|
Inline suggestions |
Yes |
Yes |
|
Auto-apply fixes |
No |
Yes |
|
CI failure analysis |
No |
Yes |
|
Auto-fix CI failures |
No |
Yes |
|
Guarantee green builds |
No |
Yes |
Gitar’s healing engine does more than identify problems. It fixes them in your real environment. When CI fails, Gitar analyzes failure logs, generates validated fixes, and commits them directly to your PR.
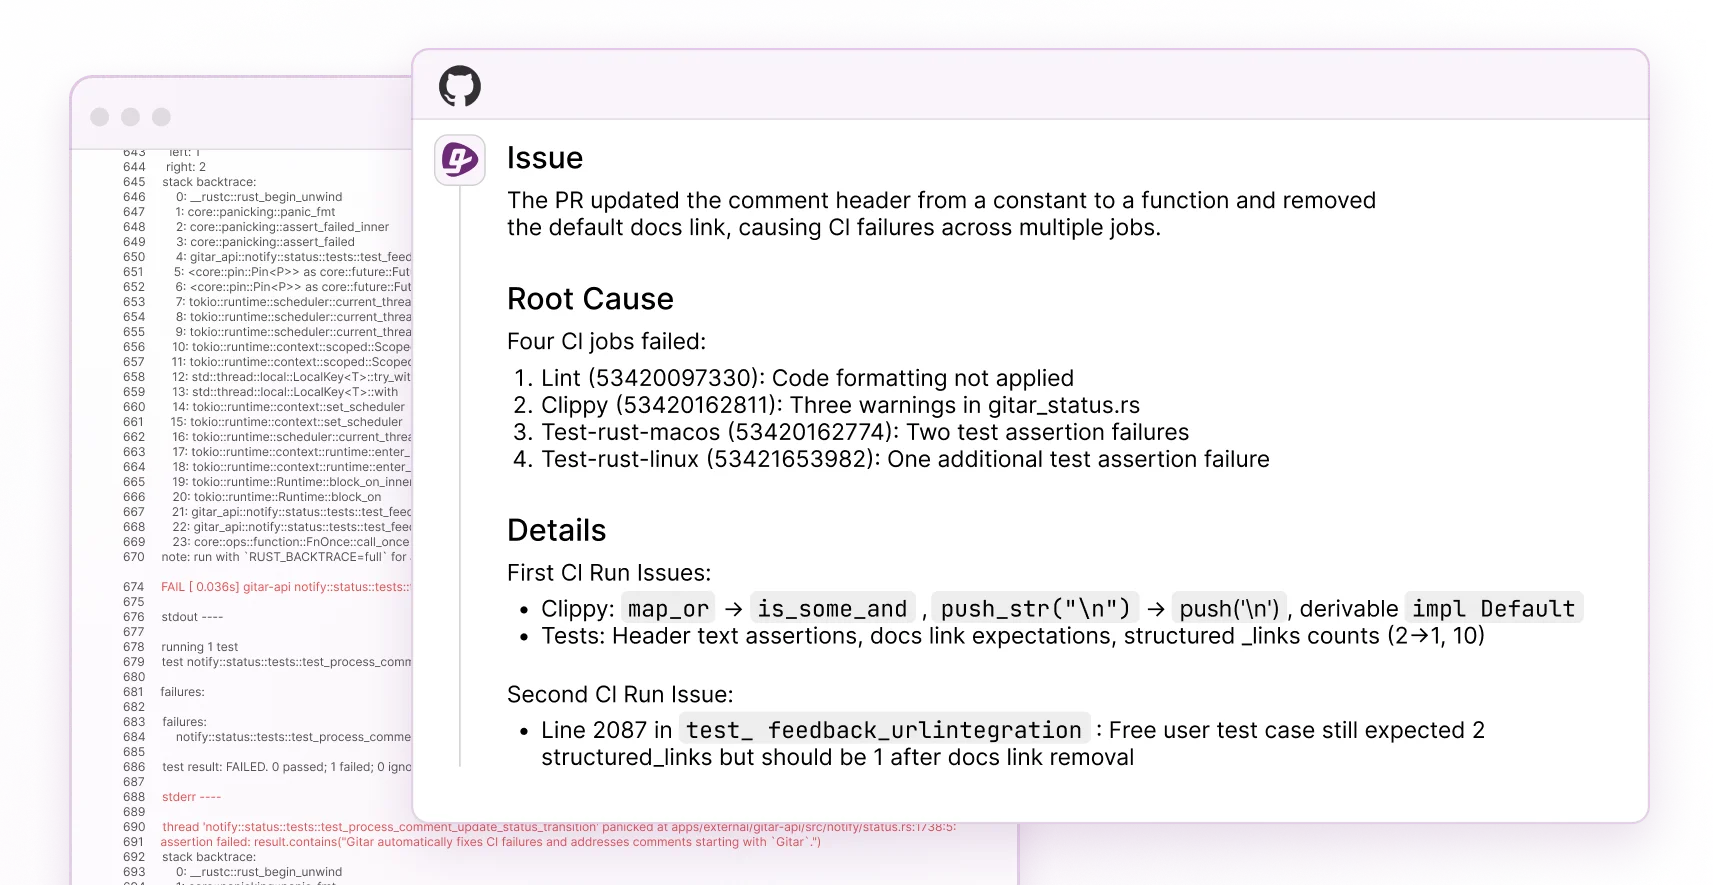
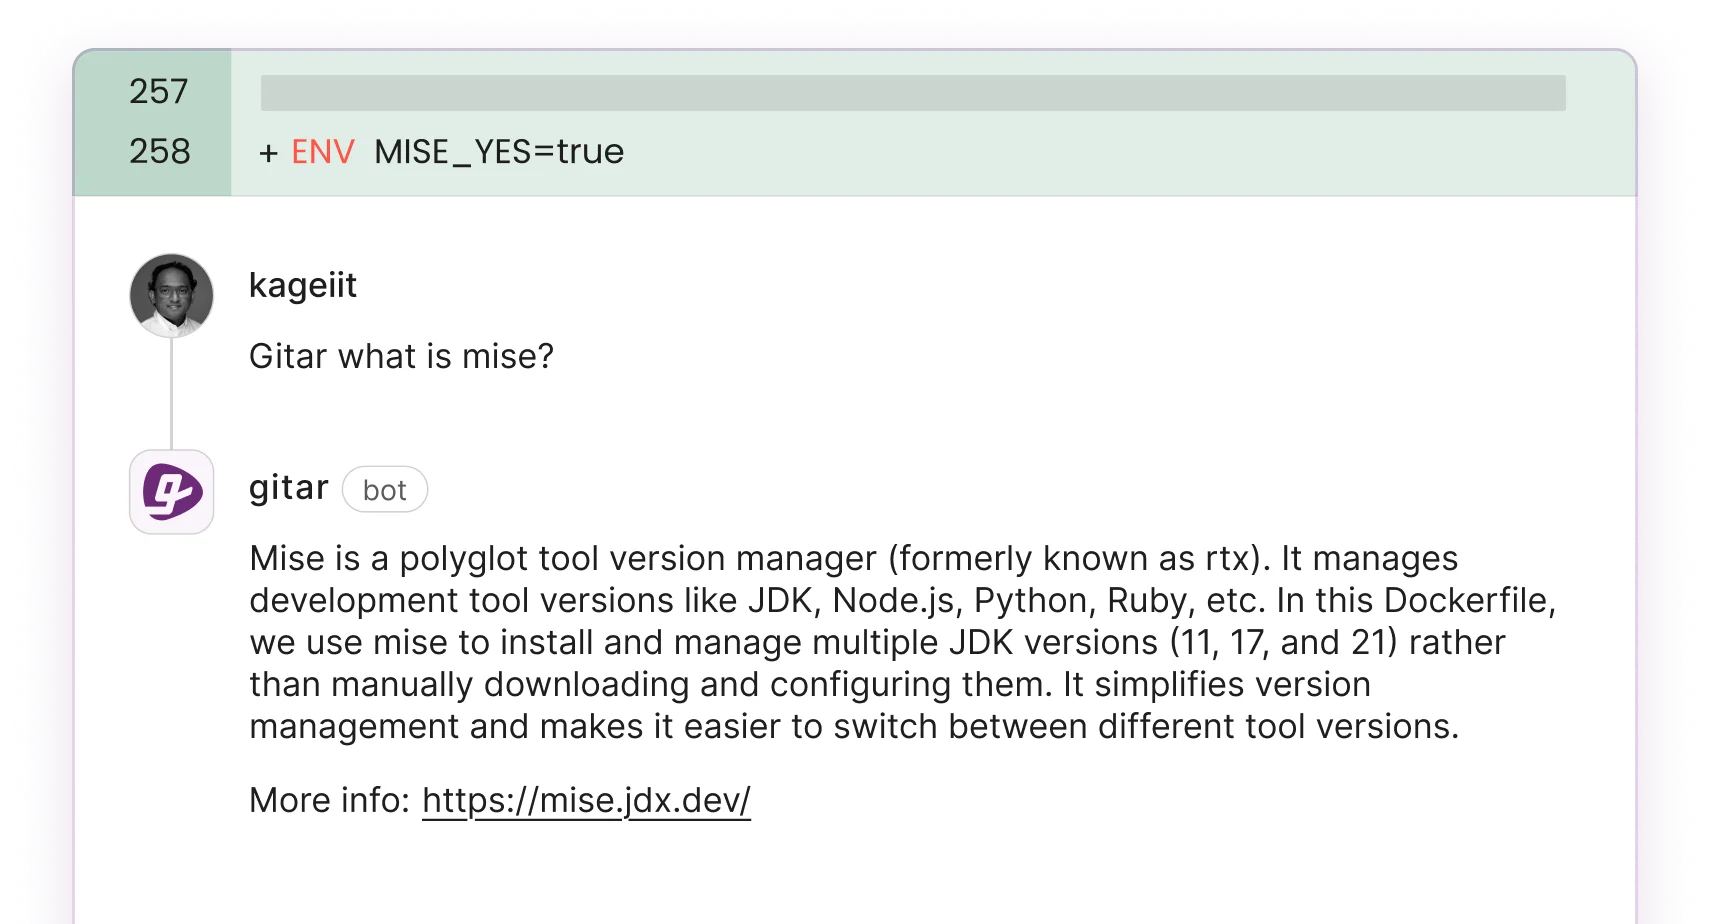
When reviewers leave feedback, Gitar applies the requested changes. This autonomous approach removes the manual work that CodeRabbit’s $15-30 per seat suggestion model still demands.
Install Gitar now to automatically fix broken builds and start shipping higher quality software, faster with our 14-day free Team Plan trial.
Gitar Setup on GitHub in Under a Minute
Gitar installs even faster than CodeRabbit and starts working right away.
- Visit gitar.ai and click “Install GitHub App”.
- Grant the requested repository permissions.
- Start your 14-day Team Plan trial.
- Watch for Gitar’s dashboard comment on your pull requests.
Unlike CodeRabbit’s suggestion-only approach, Gitar immediately begins healing your CI pipeline with validated, working fixes.
Frequently Asked Questions About CodeRabbit and Gitar
How do I use CodeRabbit with GitHub after installation?
After you install the GitHub App, CodeRabbit automatically reviews new pull requests and posts inline comments and summaries. You can control behavior through the .coderabbit.yaml file in your repository root, where you define custom instructions, tool integrations, and review preferences.
What is the main difference between CodeRabbit and Gitar?
CodeRabbit provides AI-powered code review suggestions but still expects engineers to implement fixes manually. Gitar extends beyond suggestions with autonomous auto-fixing, which analyzes CI failures, generates validated fixes, and commits them automatically.
CodeRabbit charges $15-30 per seat for suggestions, while Gitar offers a 14-day free trial that includes full auto-fixing capabilities.
Can I get automatic AI reviews on GitHub without manual fixes?
You can achieve this with Gitar, not with traditional tools like CodeRabbit that only suggest changes. Gitar delivers automatic reviews with auto-applied fixes, CI failure resolution, and guaranteed green builds.
The healing engine validates fixes against your actual CI environment before it commits any change.
How do I troubleshoot CodeRabbit GitHub setup issues?
Most issues fall into a few patterns. Check for permission errors and confirm admin access. On Mac, verify that ~/.local/bin appears in your PATH if CLI commands fail.
Also confirm that your project is a valid git repository. For persistent problems, recheck your GitHub App permissions and confirm that git initialization completed successfully.
Is there a better alternative to CodeRabbit for GitHub code reviews?
Gitar offers deeper automation with real auto-fixing capabilities that CodeRabbit does not provide. CodeRabbit focuses on suggestions that still require manual work, while Gitar’s autonomous approach fixes CI failures, applies review feedback, and keeps builds green.
Try the 14-day free Team Plan trial to see the impact on your review cycle and build stability.
Start your 14-day Gitar Team Plan trial and move beyond suggestion-only tools. Experience autonomous code review that fixes your code, resolves CI failures, and addresses review feedback while CodeRabbit competitors charge premium prices for basic commentary.